 Coachigo
Weight, measurements and photos
How to take progress photos in Coachigo
Front, back, side: take your clients' progress photos in Coachigo, with the previous photo shown as an overlay so you can match the exact same pose.
Photos show what the scale can’t. For them to compare well, you need the same pose, the same framing and ideally the same lighting every time. Coachigo helps by showing the previous photo as an overlay right in the camera.
Create a photo set
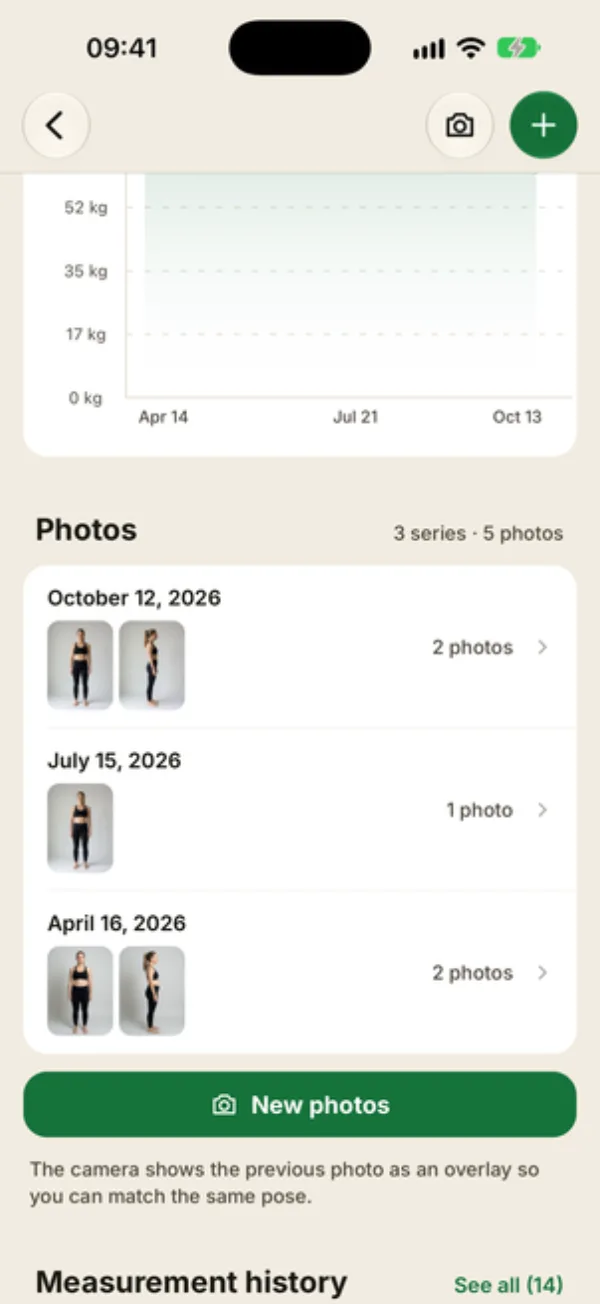
Open the client’s profile. In the Photos and measurements section, tap Add, then Photos. From the Body screen, you can also tap the camera at the top right, or New photos below the photo list.
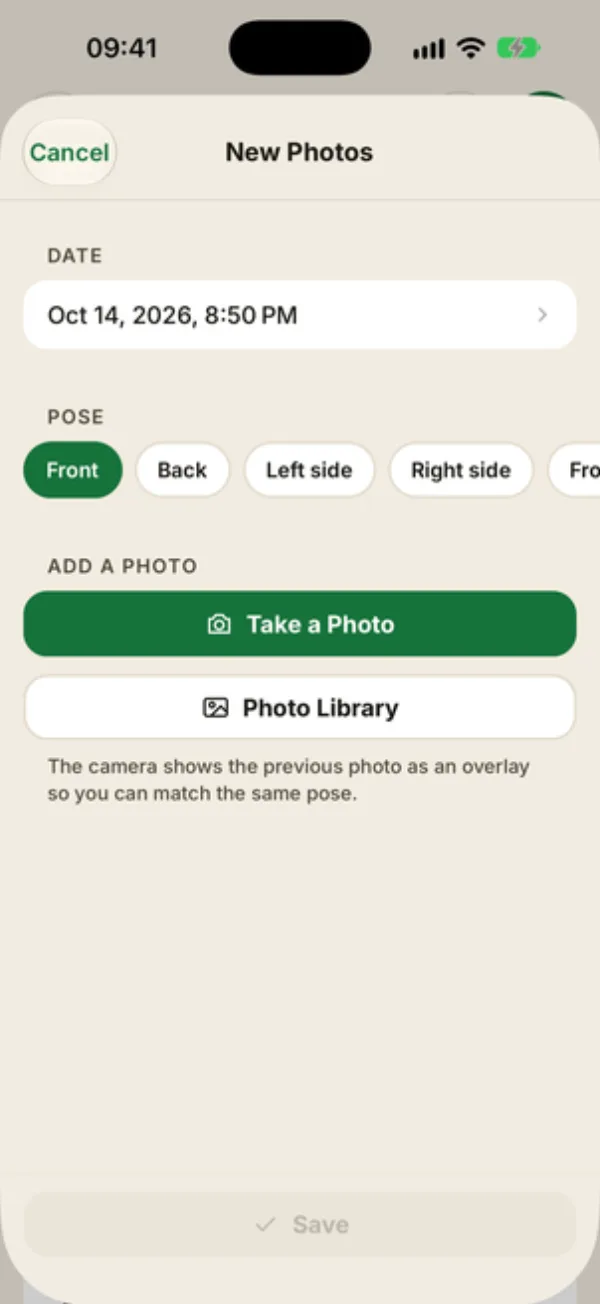
The New photos screen opens:
- Check the Date (now by default).
- Pick the Pose: Front, Back, Left side, Right side, Front relaxed, Front flexed, Back relaxed, Back flexed or Other.
- Tap Take a photo, or Photo library for a photo you already have. Photos are added one at a time. Camera shots are cropped to 3:4; for a library photo, the app lets you crop it before adding it.
- For another pose in the same set, switch poses, then add the next photo.
- Tap Save: the button shows how many photos you’re saving.
Each photo shows up as a preview before you save. Tap the X to remove one that didn’t come out right.
Match the same pose
In the mobile app, the camera shows the last photo of the selected pose as a see-through overlay. Line up the client so their outline sits on top of the old one, at the same distance, and your comparisons will be far more telling.
- the eye button, labeled “Superposition” (French for overlay), shows or hides the old photo;
- the − and + buttons adjust its opacity (30% to start, in 10% steps);
- you can switch between the back and front cameras.
For the very first photo of a pose, there’s nothing to overlay, so the camera works as usual. In the web version, there’s no overlay: the photo comes from the browser’s camera or file picker.
Find and fix photos
On the Body screen, the Photos area counts your sets and photos, then lists each set by date with its thumbnails.
Tap a set to open it: you can change its date, enlarge a photo, remove one with the X, or delete the whole set with Delete this entry. You can’t add a photo to an existing set: create a new one, on the same date if needed.
Where do the photos go?
Photos are uploaded online along with the rest of your data, so you can find them on all your devices and the client can see them if they follow their shared profile. A deleted photo or set disappears from the Body screen and from comparisons, for you and for the client.
Once you have two photos of the same pose, you can compare a before and after.
FAQ
Which poses should I use?
Front and side cover most check-ins. Add back, or the relaxed and flexed versions for a client prepping for a competition. Stick to the same poses every time.
Can my client add their own photos?
Yes, if they follow their shared profile in the app. They see your photos and can add their own. They can only edit their own sets: yours open read-only for them. You can edit every set on the profile.
How often should I take photos?
Every 2 to 4 weeks works well: far enough apart to see a difference. Same day of the week, in the morning, in the same outfit, and the photos will line up better. Remember to log weight and measurements on the same day.